Showing posts with label tutorial. Show all posts

Friday, May 24, 2013

Spring Bird's Nests


I'm sure many of you have seen the wire wrapped bird's nests floating around the web. I was dying to make some of these adorable pendants, so I found a great tutorial and went to town!  It was harder than it looked at first, but after about four ugly "practice" nests, I finally got the hang of it.


These look great as pendants on a delicate silver chain, but they also work great incorporated into more complex jewelry designs.


There are many tutorials on the web for making these cute little nests, each one slightly different, with a new tip or technique. I browsed through many, but the best one I found for myself was by fusionbeads.com. You can view the tutorial here.

Photo from Fusionbeads.com


Monday, April 15, 2013

{Tutorial} Wrapped Wire Beads


A tutorial  for making your own beads using a  simple wire wrapping technique.


Supplies:
Wire cutters
Chain nose pliers
Ruler
Wood dowel
22ga Wire


Step 1: Measure and cut 24 inches of wire.


Step 2: Leaving a tail of about 4 inches from the end, wrap the wire once around your wooden dowel.


Step 3: Continue to wrap the short end of the wire around the dowel.


Step 4: Using your chain nose pliers, push the end of the wire down, against the dowel.


Step 5:  Now take the remaining long end of the wire, and start to wrap the wire over itself, crisscrossing randomly.


Step 6: Continue to wrap all of the wire over itself. Then using your chain nose pliers, tuck the end in so it doesn't stick out.


Step 7: Slide the wire off of the wooden dowel and you're done!


Tips:
 If you use a smaller gauge, cut a longer piece of wire.

Once you remove the bead from the wooden dowel, tuck the first end of the wire into the bead hole.

Combine lots of wire beads in different colors


Friday, January 4, 2013

Multiple Strands

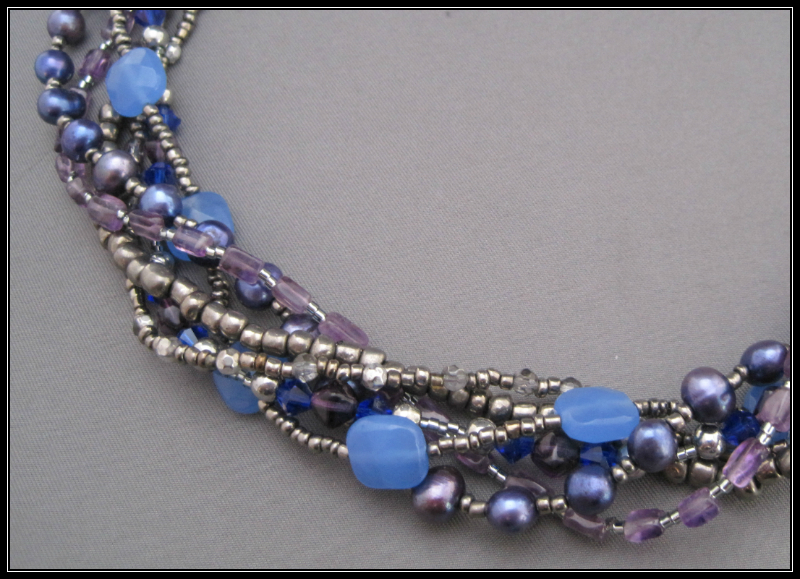
Lately I have been working on a few multi-strand designs. I'm loving the bold dimension it gives each piece and the wide range of possibilities when combining colors and materials.


This necklace is actually six strands, despite the five strand clasp. It includes Amethyst gemstones, blue freshwater pearls, traditional Czech glass and other various glass beads in grey and silver tones.


I designed this bracelet to be only half mutli-strand. Here I combined two types of Jasper (Red and Impression) with light blue faceted glass beads and a lovely handmade lampwork focal bead. A sterling silver toggle clasp features a two strand design as well :)


Tips for creating multiple strand jewelry:

1. Use a bead board to help in the design process. This handy tool has to be one of my favorite because it allows me to lay out beads and play around the the design before committing and creating the piece. This also lets me put to put my project away for a bit and I know that the beads will not be moved out of order.

Available from Prima Beads


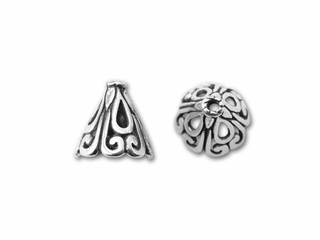
2. Let your findings make it easy. While no special clasps or findings are necessary to create multi-strand jewelry, these items can really help enhance your designs and make creating a piece much easier on yourself.
Clasp available from Prima Beads           Cones available from Art Beads


3. Experiment with different color and material combinations. Be brave and play with your stash of materials. Combine unlikely colors or contrasting materials, like rough chain and elegant pearls.


For further reading, I recommend Magpie Gemstone's article 'How to Make Multi-strand Necklaces' Part I and Part II.


Monday, December 3, 2012

{Tutorial Love} Holiday Edition

Happy December everyone! 
The following is a list of my favorite Christmas/Holiday tutorials I've found throughout the year. I can't wait to make my own ornaments and create gifts for my friends!


by The Idea Room


by Centsational Girl


by Katy Elliot


by Craftaholics Anonymous


by The Shine Project


by Shauna Mailloux


Thursday, August 30, 2012

Tips, Tricks and Cleverness

 How to find the original source of an image on


Have you ever found an interesting photo on Pinterest, only to click for the link and find that someone has pinned it from Yahoo Search or to the main page of a blog, not the post itself? Talk about frustrating!
I wanna share with you a quick and easy trick to finding the ORIGINAL SOURCE of an image.


Step 1: When you find an image with the bad link, open a new browser tab (or window) and type in images.google.com into the address bar.


Step 2: Click back on the Pinterest tab (or window). Then click and drag the image to the Google tab and into the Google search bar. When your cursor moves over the search bar it will turn into a larger, blue box. Drop your image there.


Step 3: Google works its magic and you have the original link! Happy Pinning!


I shared this trick, with another tutorial, on the Facebook Bead Soup Cafe page and it received quite a response, so I thought I'd try my hand at creating my own tutorial. I hope it is clear enough to follow and that you find it useful!

Saturday, February 18, 2012

Upcycled Copper Flower Earrings

About a year ago I started the 'Upcycled Jewelry Project' with the idea of collecting old and unwanted jewelry as donations. Then, I rework the jewelry into new and sellable designs and donate proceeds from these sales  to local organizations that help women in need. Although I don't get to spend as much time as I'd like on this project of mine, there has been such a supporting from people and it is so fun that I try to make a couple pieces a month.


These earrings were made from old clip-on flower earrings, vintage glass pearls and metal spacers from a donated necklace and scrap wire.


+

(Tip: Don't be afraid really dirty jewelry. Warm, soapy water will make them look like new!)


Finished Earrings!

Related Posts Plugin for WordPress, Blogger...